If you’ve been helped by my website, please consider a donation, $1, $5, $5, $10, $10, whatever you can. Not for me, but for those who need it rather more.
[paypal-donation]Donating through JustGiving is easy & totally secure. Your details are safe – they’ll never sell them on or send unwanted emails.
All-in-one wp migration tutorial
This guide will help you to transfer your website built in WordPress to your hosting using a website’s backup.
If you have your backup you can start the guide from the step2.
This guide will come handy when you are want to transferring your customer website yourself.
First thing first, we need to ask their hosting DNS and cpanel detail so we can log in to their hosting and move the site inside. It will need some database modify a little bit.
- Back Up Your Wp-content folder & mysql database
– Go to your hosting, then “File Manager” and choose your website directory. Then you will see “wp-content” folder, simply compress it and download the file to your computer.

– Go To “phpmyadmin” and select the database associated with your website, if you are forgot what is the name, you can go back to your website directory and open up the “wp-config”, you will see there the database name and detail.

After you are inside phpmyadmin, You need to check table having overhead and select
“optimize tables”

Now Go To “Export” tab and export your database to your computer

By Now You have wp-content folder and mysql database in your computer, we will use it later on customer hosting.
- Update the domain DNS With Customer Hosting DNS
Ask your customer about their DNS address. It should contain 2 address url. Then update it with the domain, you can do this by log in to your domain registrar.
- Add The Domain To Their Hosting
Log in to your customer hosting and add the domain as addon domain.
- Install new wordpress blog on Customer Hosting
Start Installing WordPress blog on the domain. You can do this by using fantastic deluxe if you use hostgator ( some hosting use softacolous).
- Go To Website File Directory And Upload “wp-content” folder
Go to “File manager” on the hosting and Select the website name. You will be redirected to the website file directory. Now we need to upload the “wp-content” file that we have to the directory, simply click “upload” on top navigation menu, and upload the file.
After Finished, go back to the website directory and click “reload” . Now You will see the file there. Highlight the file and click “extract”.

- Creating New Database
In this step we will create new database on customer hosting and import our saved mysql database to this new created database.
Simply Follow this step :
Go to MySQL® Databases

Create New Database There

Then we need to create a new user for our database
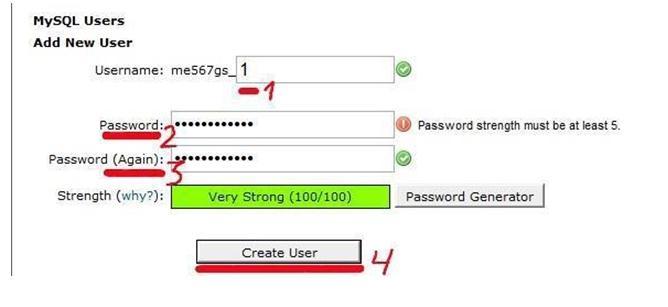
Add user to DataBase ( The new database name and username we have created) > select
“ALL > Make changes

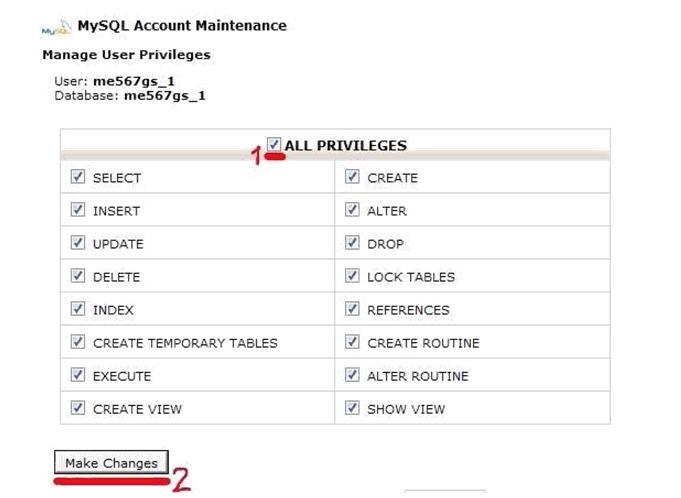
Now We have created new database, Pease note that we need to save the information on text file so you are not forgetting everything.
Save The Information Like Database name, Username, and Password associated with the username. We will use the information later. Next step we will import our save mysql database to this database.
Go To Phpmyadmin and select the database name we have created
Click The Import tab then browse our save mysql database and click “ Go”
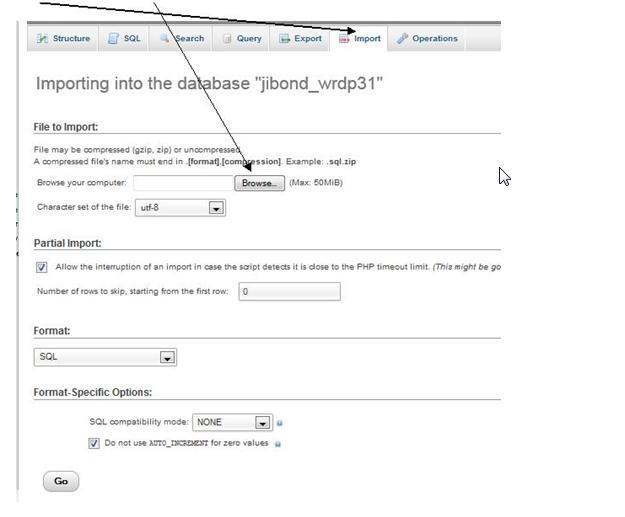
Now your new database is successfully done and just one last step to connect this database the the site.
- Connecting Database To The Website
Go to “File manager” and select our website. This will brought you to the website file directory.
Click the “wp-config.php” and edit it.
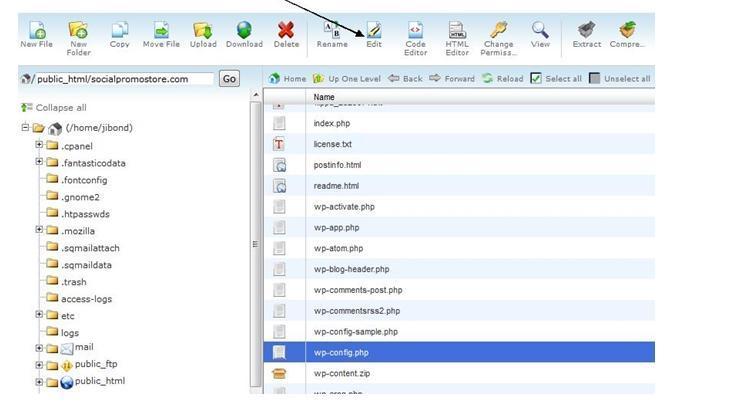
Update with The Database Name, Username , and Password that we have created before

Save Changes everything,
CONGRATULATION YOUR SITE IS NOW FULLY MOVED!
Last Final Check will be type the website address is everything is load perfectly. Then
Log In To Your Website and go to “option” -> “permalink”
And save changes the permalink setting, In my experience this will update the site with new address and hosting. If you not do this step you will see every page will give “404 page not found” common problem when moving site to a new host.
Follow this step and your site will be okay, and to manage the site you need to login into the wordpress site admin panel:
yourdomain.com/wp-admin